This blog is supported through the affiliate links below
Oiling Out Paintings 101: What it is, Why it's Done, and How to Do it Right
Oiling out is a technique that can help you achieve a smooth and vibrant surface in your painting. Many times while working in oils, the painting will dry unevenly which makes it difficult to see what you're working on. So whether you're a beginner or a seasoned painter, oiling out can be a valuable step in your painting process. In this article, we'll go over the basics of oiling out a painting, what to consider, and how to do it.

Note: This blog contains affiliate links and purchasing through them supports our site at no extra cost to you.
So, what is oiling out?
Simply put, oiling out is the process of applying a thin layer of oil, usually a medium or solvent, to a dried layer of oil paint to make it more flexible and workable. This allows you to blend colors, create smooth transitions, and achieve a uniform surface. More importantly, oiling out evens out the sheen of the painting surface so that you can determine what work needs to be done to finish it.

How to oil out a painting
First, make sure your painting is at least dry to the touch. It's smart to wait a week after it's dry to the touch, but some pigments can take even longer to dry enough to where they wont be disturbed during the oil out process. On the other hand, some paint and medium combinations will be dry much more quickly. This will all depend on a variety of circumstances, so just be aware of it and proceed with caution.
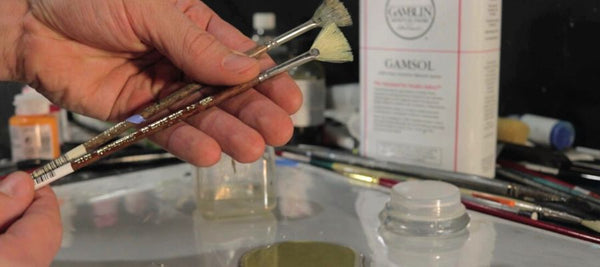
When you feel the painting is ready, ensure that your brush and materials are clean prior to starting. Then, mix some of your preferred oil medium with a solvent such as mineral spirits. This mixture can vary, but many suggest a 1:1 ratio of oil to solvent.
Apply the mixture to the painting surface and let it sit anywhere from 30 seconds to a minute. The solvent in the mixture needs a little time to cut into the paint layer, but not too much that it damages your work. This is definitely an art and not a science, so it will take some practice to get a good system down and avoid mistakes. Always test your methods before doing this on a really important piece.

Once the mixture is evenly applied throughout, use a lint free rag or my favorite, a makeup wedge, to wipe the mixture off the surface. Using something like a sponge is better in my eyes as there will be no risk to leaving any debris or fibers from the rag behind. Once the painting is thoroughly wiped off, you can then begin working on it again with your paints.

At this time you're painting should now look more glossy with a rich and even shine, making it easier to work on. It's worth noting however, that you shouldn't oil out an area that you've already painted with a thick, impasto style, as this can cause the paint to crack and separate.
Oiling out should really only be done when absolutely necessary for you to complete the painting and it I would advise to not do it more than once. Remember that this is a tool to allow you to see where you're at in the process when your painting has dried too unevenly to determine what you should do next. Don't be deterred from doing it, but strive to see how long you can go without oiling out. It took many years, but I rarely oil out my paintings these days as I've become more comfortable with how I work. Occasionally though, I do need to use this technique.
Why would you NOT want to oil out?
While oiling out is a valuable technique for many artists, there are some who choose not to use it during the painting process. One reason for this is that oiling out can change the texture and appearance of the paint, which may not be desirable for those who prefer a more matte or impasto surface. Additionally, oiling out requires the use of solvents, which can be toxic and emit fumes that may be harmful to the artist's health. Always use a quality solvent made with the highest safety standards.
Furthermore, oiling out can add an extra layer of complexity to the painting process, which some artists prefer to avoid. Some artists simply prefer the traditional oil painting technique, which involves layering thin glazes of paint to build up color and depth. For these artists, oiling out is simply not a necessary step in their process.
Regardless of whether or not an artist chooses to oil out, what's most important is that they find a painting process that works for them and allows them to express their creativity and vision.

What can I use for oiling out?
Here is a list of commonly used oil painting mediums that can be used for oiling out along with a solvent:
- Linseed oil
- Galkyd
- Liquin
- Poppyseed oil
- Walnut oil
- Stand oil (a thick, slow-drying form of linseed oil)
It's important to note that each of these mediums has its own unique properties and uses, so it's best to experiment and find what works best for you. I always recommend to use the medium that you already are using in your painting.

Hopefully this has helped clear up a few questions you might have had around oiling out your paintings and provided you with a few things to consider before trying it. Many artists will give you contradicting advice on this and that's okay because remember again that this is truly an art and not a science. So relax, experiment, and enjoy the process of learning!
Grow Your Painting Skills and Resources
Instant access to 1000s of royalty-free reference photos of landscapes and wildlife as well as step by step oil painting videos. Checkout My Memberships for more info.

I'm Chuck Black, landscape and wildlife artist based in Southwest Montana.
Explore More