This blog is supported through the affiliate links below
Varnishing Oil and Acrylic Paintings - Everything You Need To Know
How to varnish artwork and what type of varnish to use for oil paintings, acrylic paintings, or even other media is important for all artists to know. Varnishing a painting is a critical step in preserving the life of your art. Depending on the final presentation you wish to have, you may decide between a few different types of varnish, however there's really only one I tend to stick to. In this post you'll learn not only why varnishing is important and what to use, but more importantly how to go about applying the varnish to ensure the maximum longevity of your precious creations.
Note: This blog contains affiliate links and purchasing through them supports our site at no extra cost to you.
First, let's talk about what varnish even is.
Varnish is one of easiest way's to improve the look of your finished and cured painting. It is a colorless, odorless solvent that acts as a non-porous barrier between the painting and dust, dirt, and pollutants that will inevitably collect on a paintings surface over time. Since all those environmental pollutants stick to the varnish, rather than the painting, at some point down the road that varnish layer can be removed and replaced with a fresh coat of varnish.

Not only does varnish preserve and protect, it also gives your paintings surface a cohesive look. For example, you may probably notice after a painting is done and dried that there are dull spots and glossy spots in different areas of the painting. This happens because oil pigments have differing absorption rates depending on the surface you're painting on.

For example, if you're painting on an acrylic or gessoed primed canvas, they will be more absorbent which means you may encounter more dull spots. If you're painting on smooth panel, you still can encounter dullness from time to time. At any rate, you can bring back the dulled darker values and revive saturation easily with varnish.

Removable Vs Permanent Varnish
It's important to know the difference between removable and permanent varnishes. A removable varnish can be applied generally sooner than a permanent as it allows the paint beneath to breathe and cure after it's applied. A permanent varnish is much for suited for the long term however. The downside might be that permanent varnishes like dammar tend to darken with age and have a slight warmth to them. Many painters love these varnishes regardless!
When applying a permanent varnish to an oil painting you should probably wait the better half of a year or more before applying. Removable varnishes will last a long time though (even decades) and it's why its become a popular choice amongst oil painters who don't wish to wait that long to sell or display a painting.

Oiling-out VS Varnishing:
While both processes resaturate colors laid down on the canvas, Oiling-out is meant to make your painting surface more receptive to a new layer of wet paint, meaning, a few days of painting sessions will look like one cohesive session. Think of it as rehydrating your canvas surface. Not oiling-out before starting a new painting session can make things hard to see, and can mean your paint will be applied with more difficulty and dryness. I like to use a new makeup sponge and a mixture of odorless mineral spirits mixed with my galkyd medium for oiling-out. Other oils such as linseed or safflower oil can be used for oiling-out, ideally you should be using the same medium you're using to mix your paints with for oiling-out. Varnish is meant to be applied after a painting has been completed.

Types of Varnish:
Most varnishes sold for oil paintings can also be used for acrylic paintings, but it's always a good idea to review the manufacturers recommendations beforehand. They are available in different finishes including glossy, matte, and satin and each will affect the finished look in different ways.
- Glossy finish will make colors appear more vibrant.
- Matte finish will reduce glare and soften color.
- Satin finish meets in the somewhere in the middle between glossy and matte.
- For a semi-gloss look, you can mix matte and gloss varnish together.
With some practice and experimentation you'll discover what you prefer and what suits your artwork best.

Varnish Applications:
Spray varnish is easy to use and may be preferred over brush application for fragile surfaces that could be disrupted by a brush. Or with surfaces that have rough or impasto textures where brushes can cause bubbles to form. Always make sure your work is completely dry and cured and to use proper ventilation whenever using spray varnish.
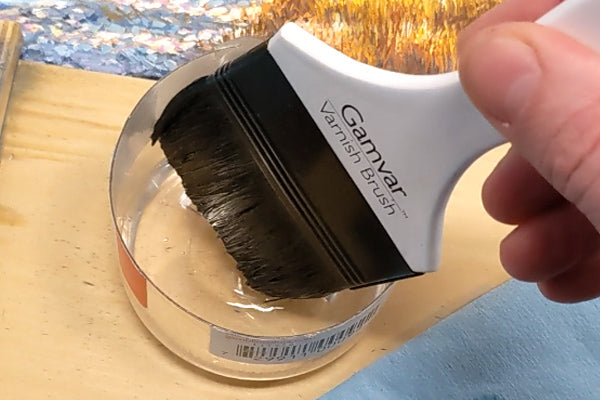
Using a brush is the traditional and my preferred method of applying varnish. You need to use a brush that is thick enough to contour to all the textures of your painting and stiff enough to evenly and thinly varnish your painting. I have used this wide, stiff bristled 1.5" Flat Brush by Princeton with great success. Gamvar recently came out with their own varnish brush and I'm looking forward to trying their 2" brush.
How to Apply Varnish:
Whether I'm working in acrylics or oils, I use Gamvar Gloss removable varnish to seal and protect my paintings before they're sent off to their new homes. Compared to traditional varnishes, Gamvar varnish is unique in that it is also a breathable varnish, which means that it allows the painting to continue to cure even after the varnish is applied. So you don't have to wait months and months like traditional varnishes.

Before I apply the varnish, I'll make sure that my surface and surrounding area is clean. I use canned air to lightly dust the painting and gently swipe the painting to make sure there's no other kind of dust or debris stuck on the surface. I grab my wide bristled brush and pour a dime-sized amount of gamvar gloss on the bristles and work the varnish into the bristles by pushing the brush onto a piece of paper towel.

It's important for me to apply the varnish as thinly as possible, a little goes a long ways! If someone does restore the painting at a later time, you don't want too much varnish built up on the canvas. Gamvar varnish is removable with any mineral spirits

Before moving on, I make sure I've got an even coat throughout the painting. Then I vigorously scrub the brushes bristles into the painting, making sure that I get a good adhesion of the varnish to the canvas and that everything is nice and uniform. So I give it a good scrub down and then I go over it a third time. It's basically just a final "wipe down" just to even out and level the surface.

The last thing I'll do before letting it fully dry is to meticulously scan over the painting. I'm checking for any little brush hairs or debris left on the painting and I'll use the same varnish brush to remove anything if necessary. Once everything looks clear, I let it dry for about 18-24 hours and at the end of that I'm left with a beautiful, shiny surface that shows off the painting to it's fullest extent for years to come.
When To Varnish:
Now, when applying this varnish to acrylic paintings, you can apply it probably within 24 hours or maybe within a couple days of finishing. With oil paints, I would wait a minimum of 1-2 weeks, potentially 3-4 weeks. It really depends on how you paint, how much medium you use, ambient temperature, layers of paint, etc. You want the paint to be fully dry to the touch and firm. If you feel any soft spots, you're not quite ready for varnish. And remember if you use Gamvar varnish, it is breathable which allows you to apply it when your painting is firm and dry to the touch and your painting will continue to cure.

Varnishing your painting before it's completely cured can lead to problems down the road. For one, if the paint is still curing, varnish solvents can soften and bind with the paints, thus making it difficult or impossible to remove should it need re-varnishing in the future. There is also risk of the artwork wrinkling or cracking since the paint is technically still "breathing" under the varnish.
For oil paintings, I use an alkyd-based medium, which helps to dry the paint fairly quickly in terms of oil paints. This allows me to add new layers day to day. Some of my larger paintings have thicker impasto like textures so those paintings can take a little longer than 4 weeks to cure.
Main points I want to drive home:
- Varnishing your paintings will increase the longevity of your artwork
- Varnish is an easy way to make your paintings look better
- Using a removable, breathable varnish like Gamvar will allow you to apply it earlier than traditional varnishes.
- Make sure your painting is dry and firm to the touch prior to applying varnish. Various factors play into when it's safe for you to do so.
- And finally, apply your varnish in a thin layer to a dust and debris free painting. Check for any leftover debris before fully letting it dry!
Watch This Process In This Video Below:
Grow Your Painting Skills and Resources
Instant access to 1000s of royalty-free reference photos of landscapes and wildlife as well as step by step oil painting videos. Checkout My Memberships for more info.

I'm Chuck Black, landscape and wildlife artist based in Southwest Montana.
Explore More